Writing my first firmware
So for the past few days, I have become obsessed with the microcontrollers, displays, and 3d printing. It all started from the simple idea by @PunnyParadox, who mentioned he was learning to program ESP32 and had some cool ideas for it.
So I asked Claude.
Turns out ESP32 is like a miniature version of Raspberry Pi with inbuilt essentials like WiFi and Bluetooth integrated and you can program it like the Pi. Not that I had written anything before or even seen it in person but that gave me an anchor point.
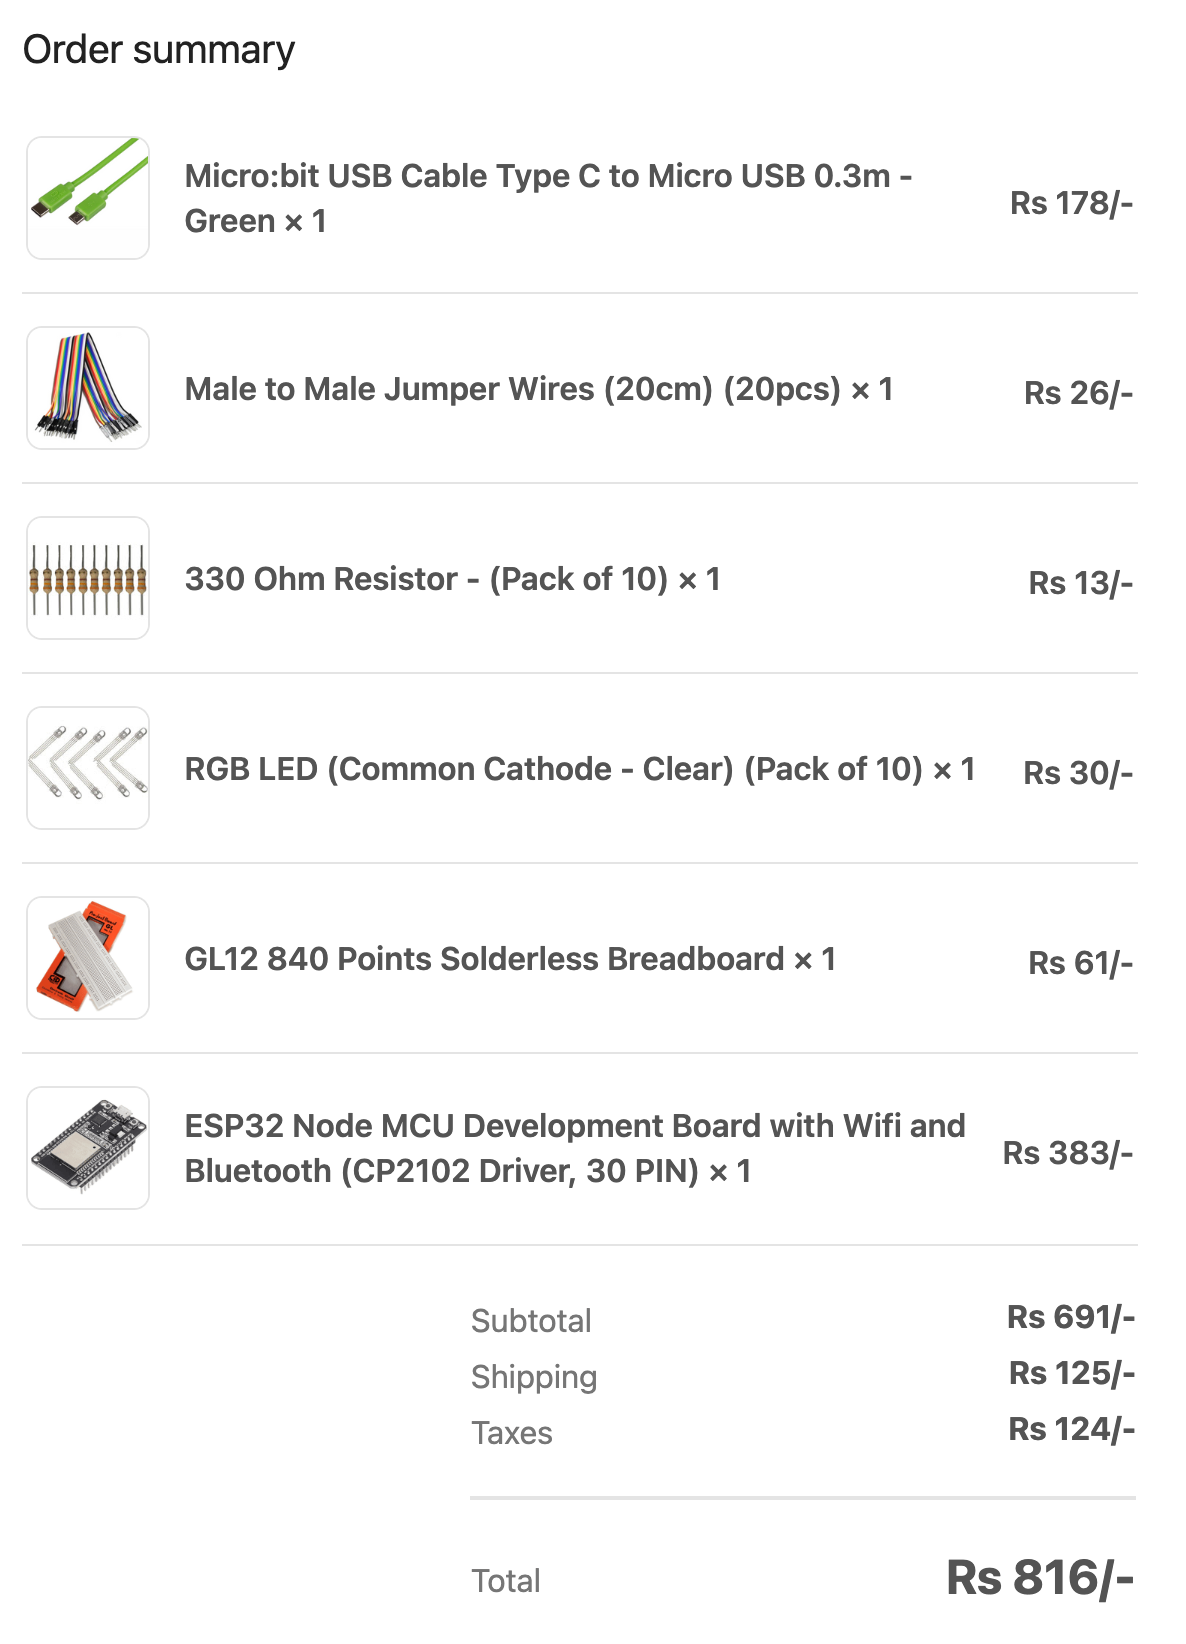
So I asked Claude again: What's the simplest proof of concept I can do with ESP32 that gives me a feel of making something. And it asked me to get the following things:
We still weren't sure what we wanted to build so once the order arrived, we started with a goal of just make the LEDs glow in cycle - red, green, blue, red. Since I hadn't seen any of these stuff before, it took sometime to dig deep into what each of them meant.
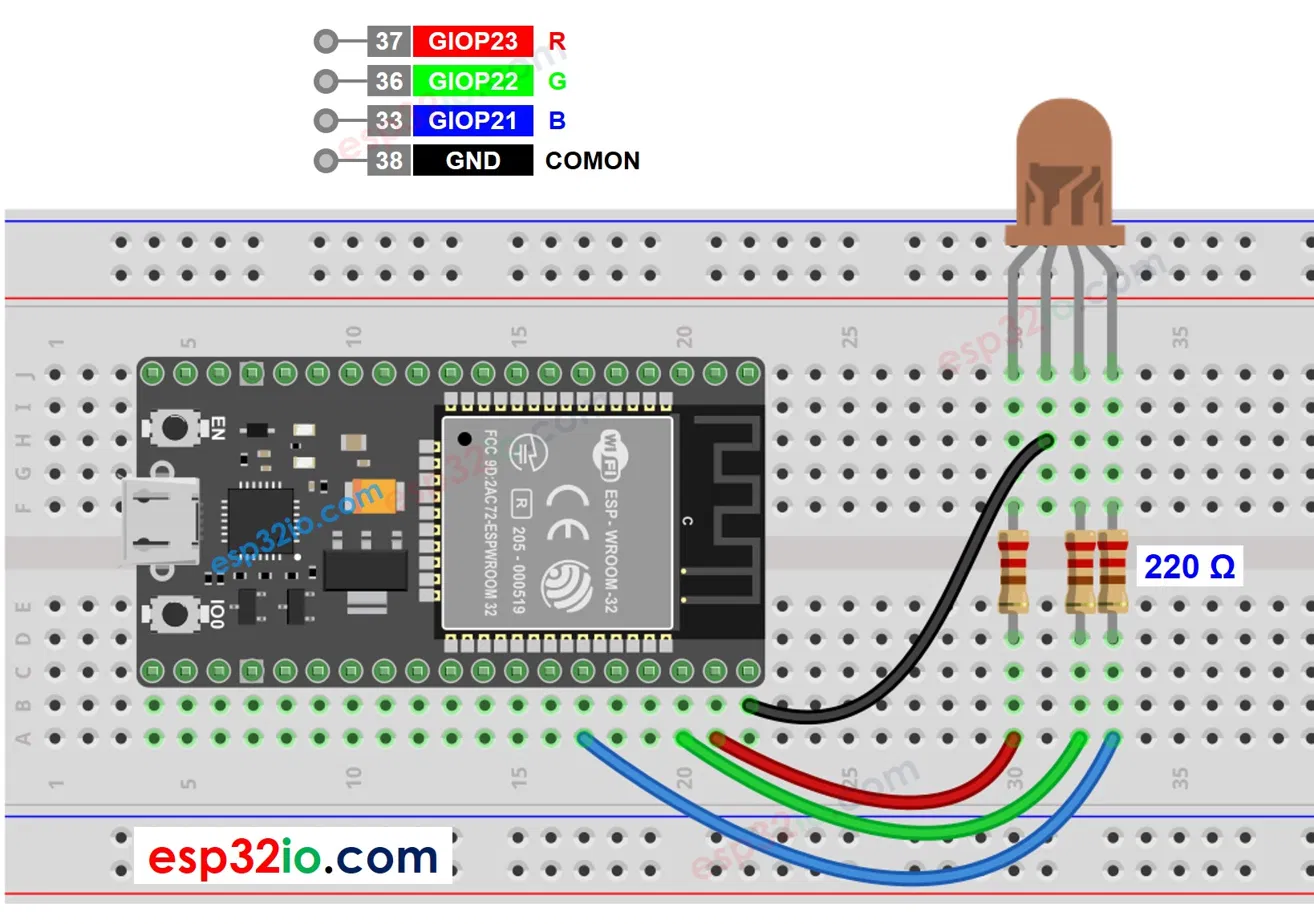
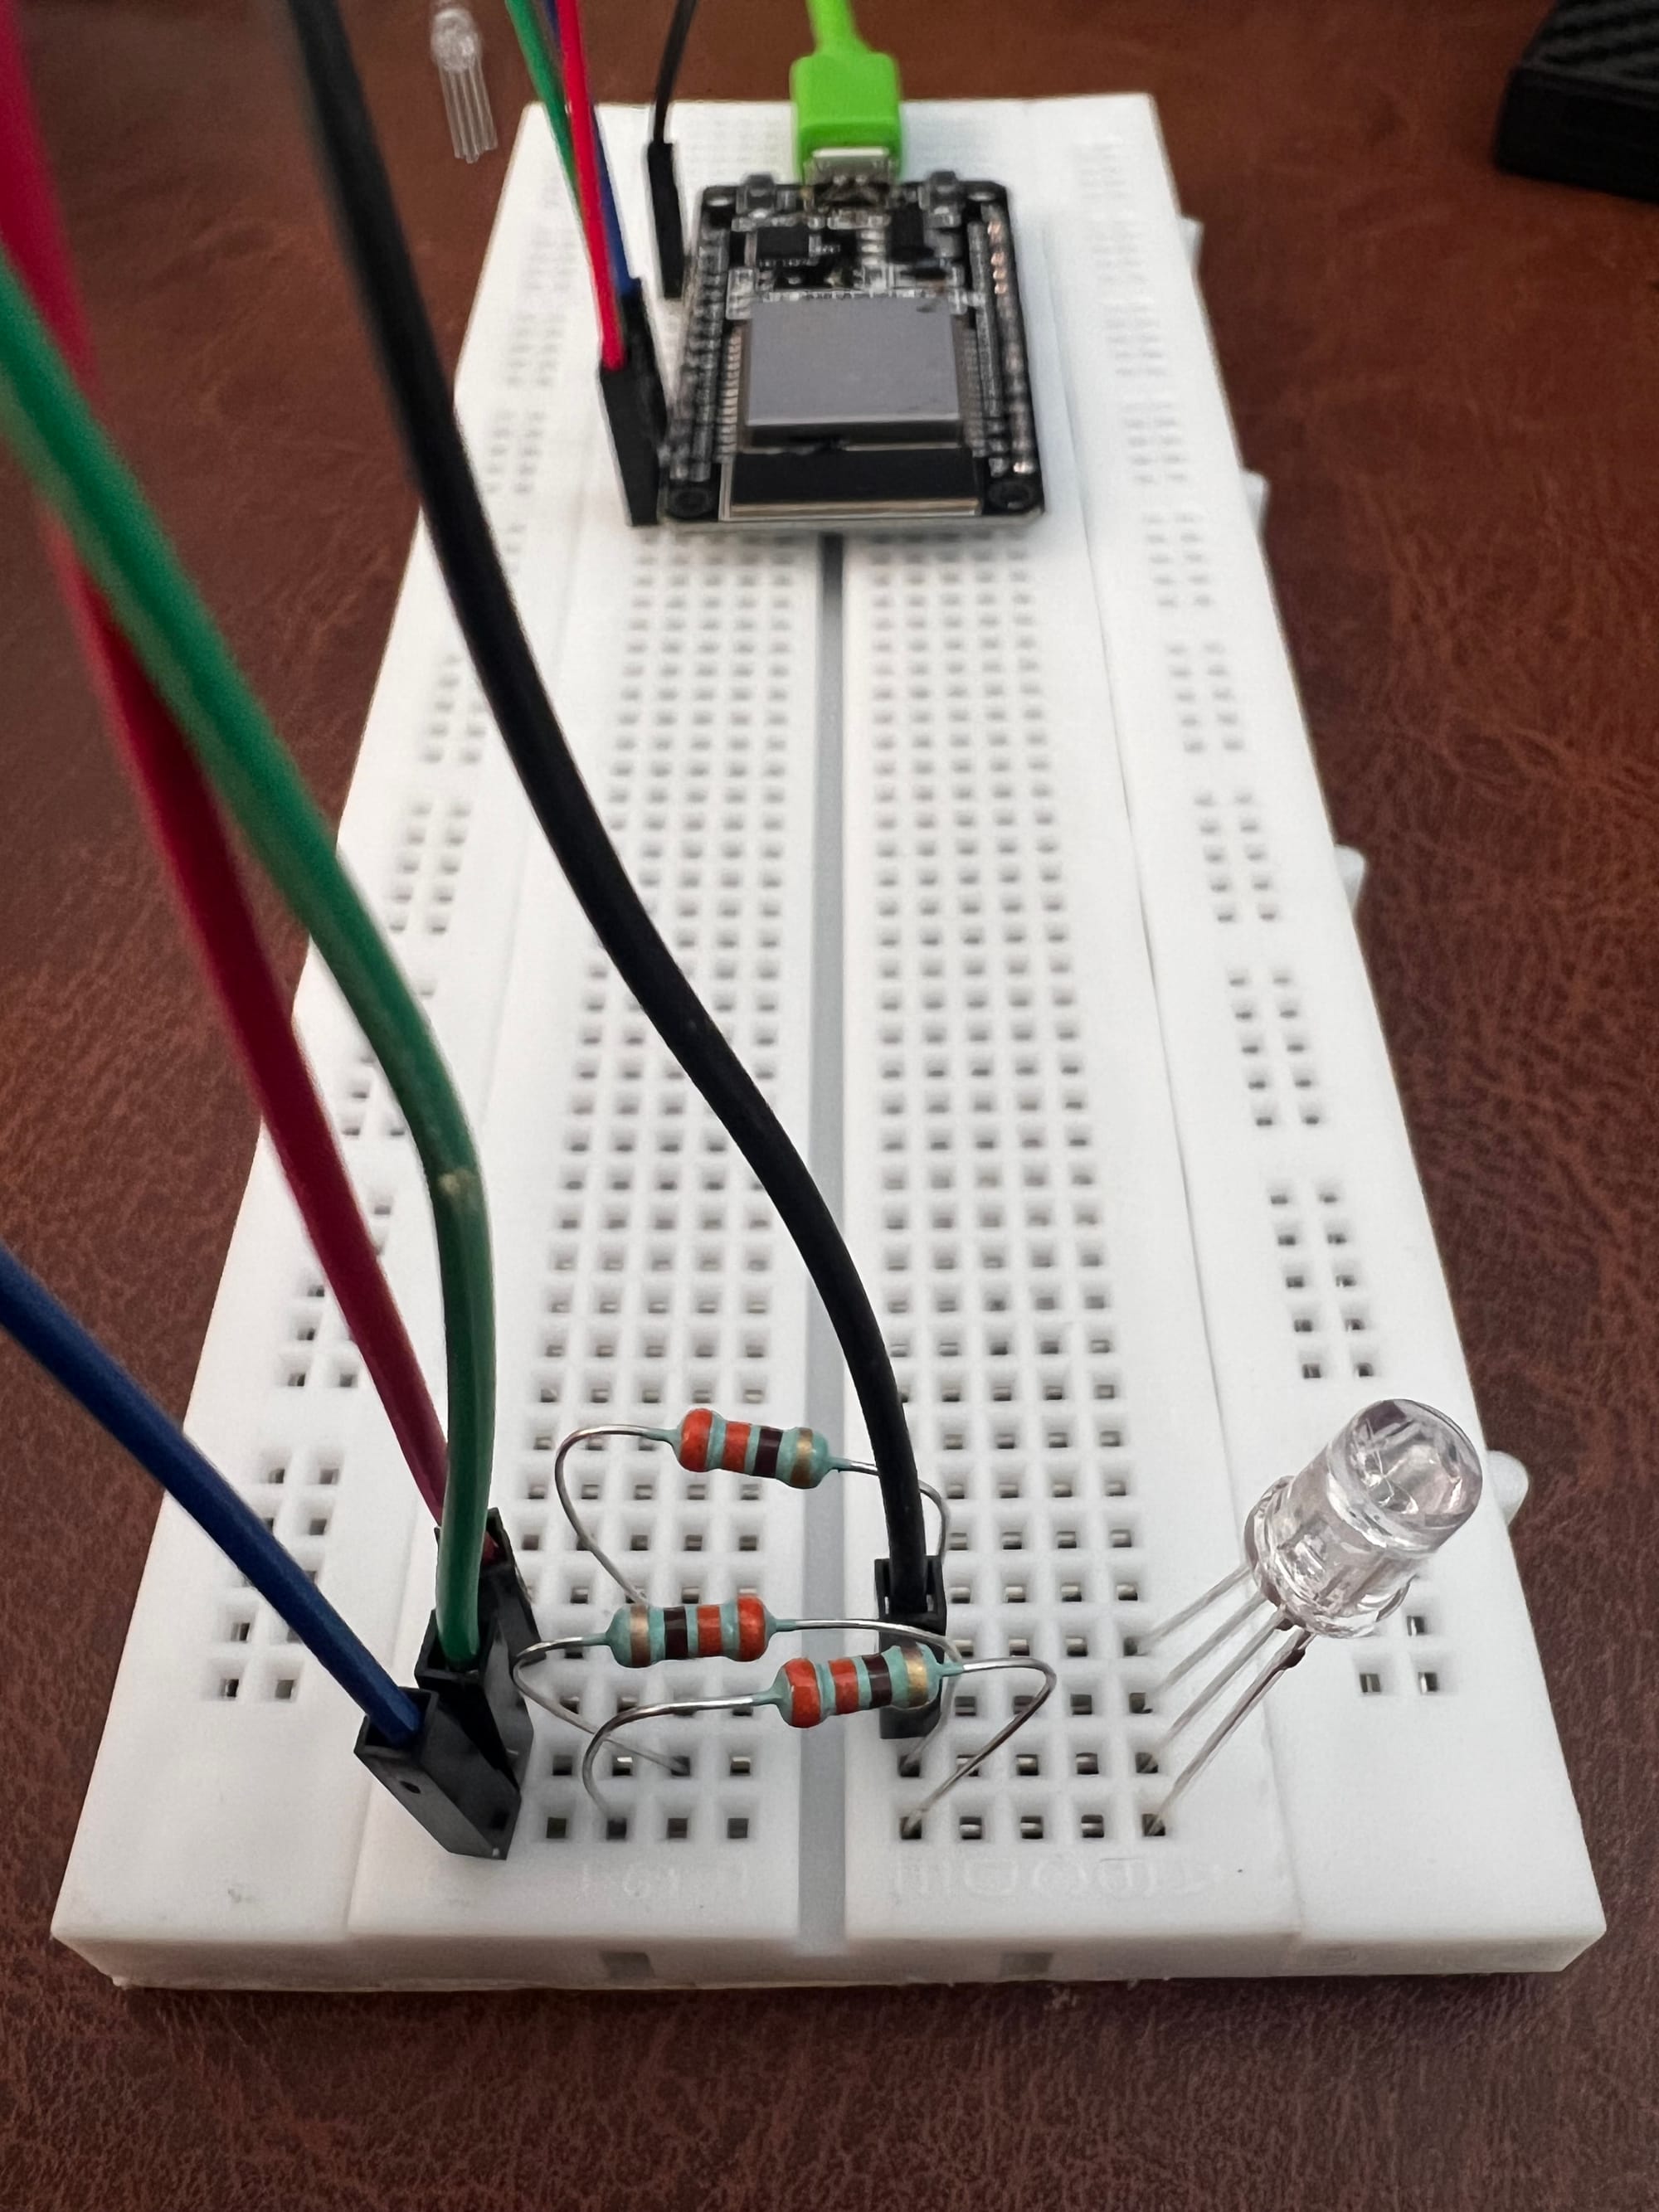
The biggest eureka moment was the Solderless Breadboard. These have slots and each slot in the column is connected. So to connect the ESP32 pins with the LEDs pins, you just push the ESP32 pin down and use any of the holes in the same column to connect. LEDs and ESP32 - both use pins for communication.
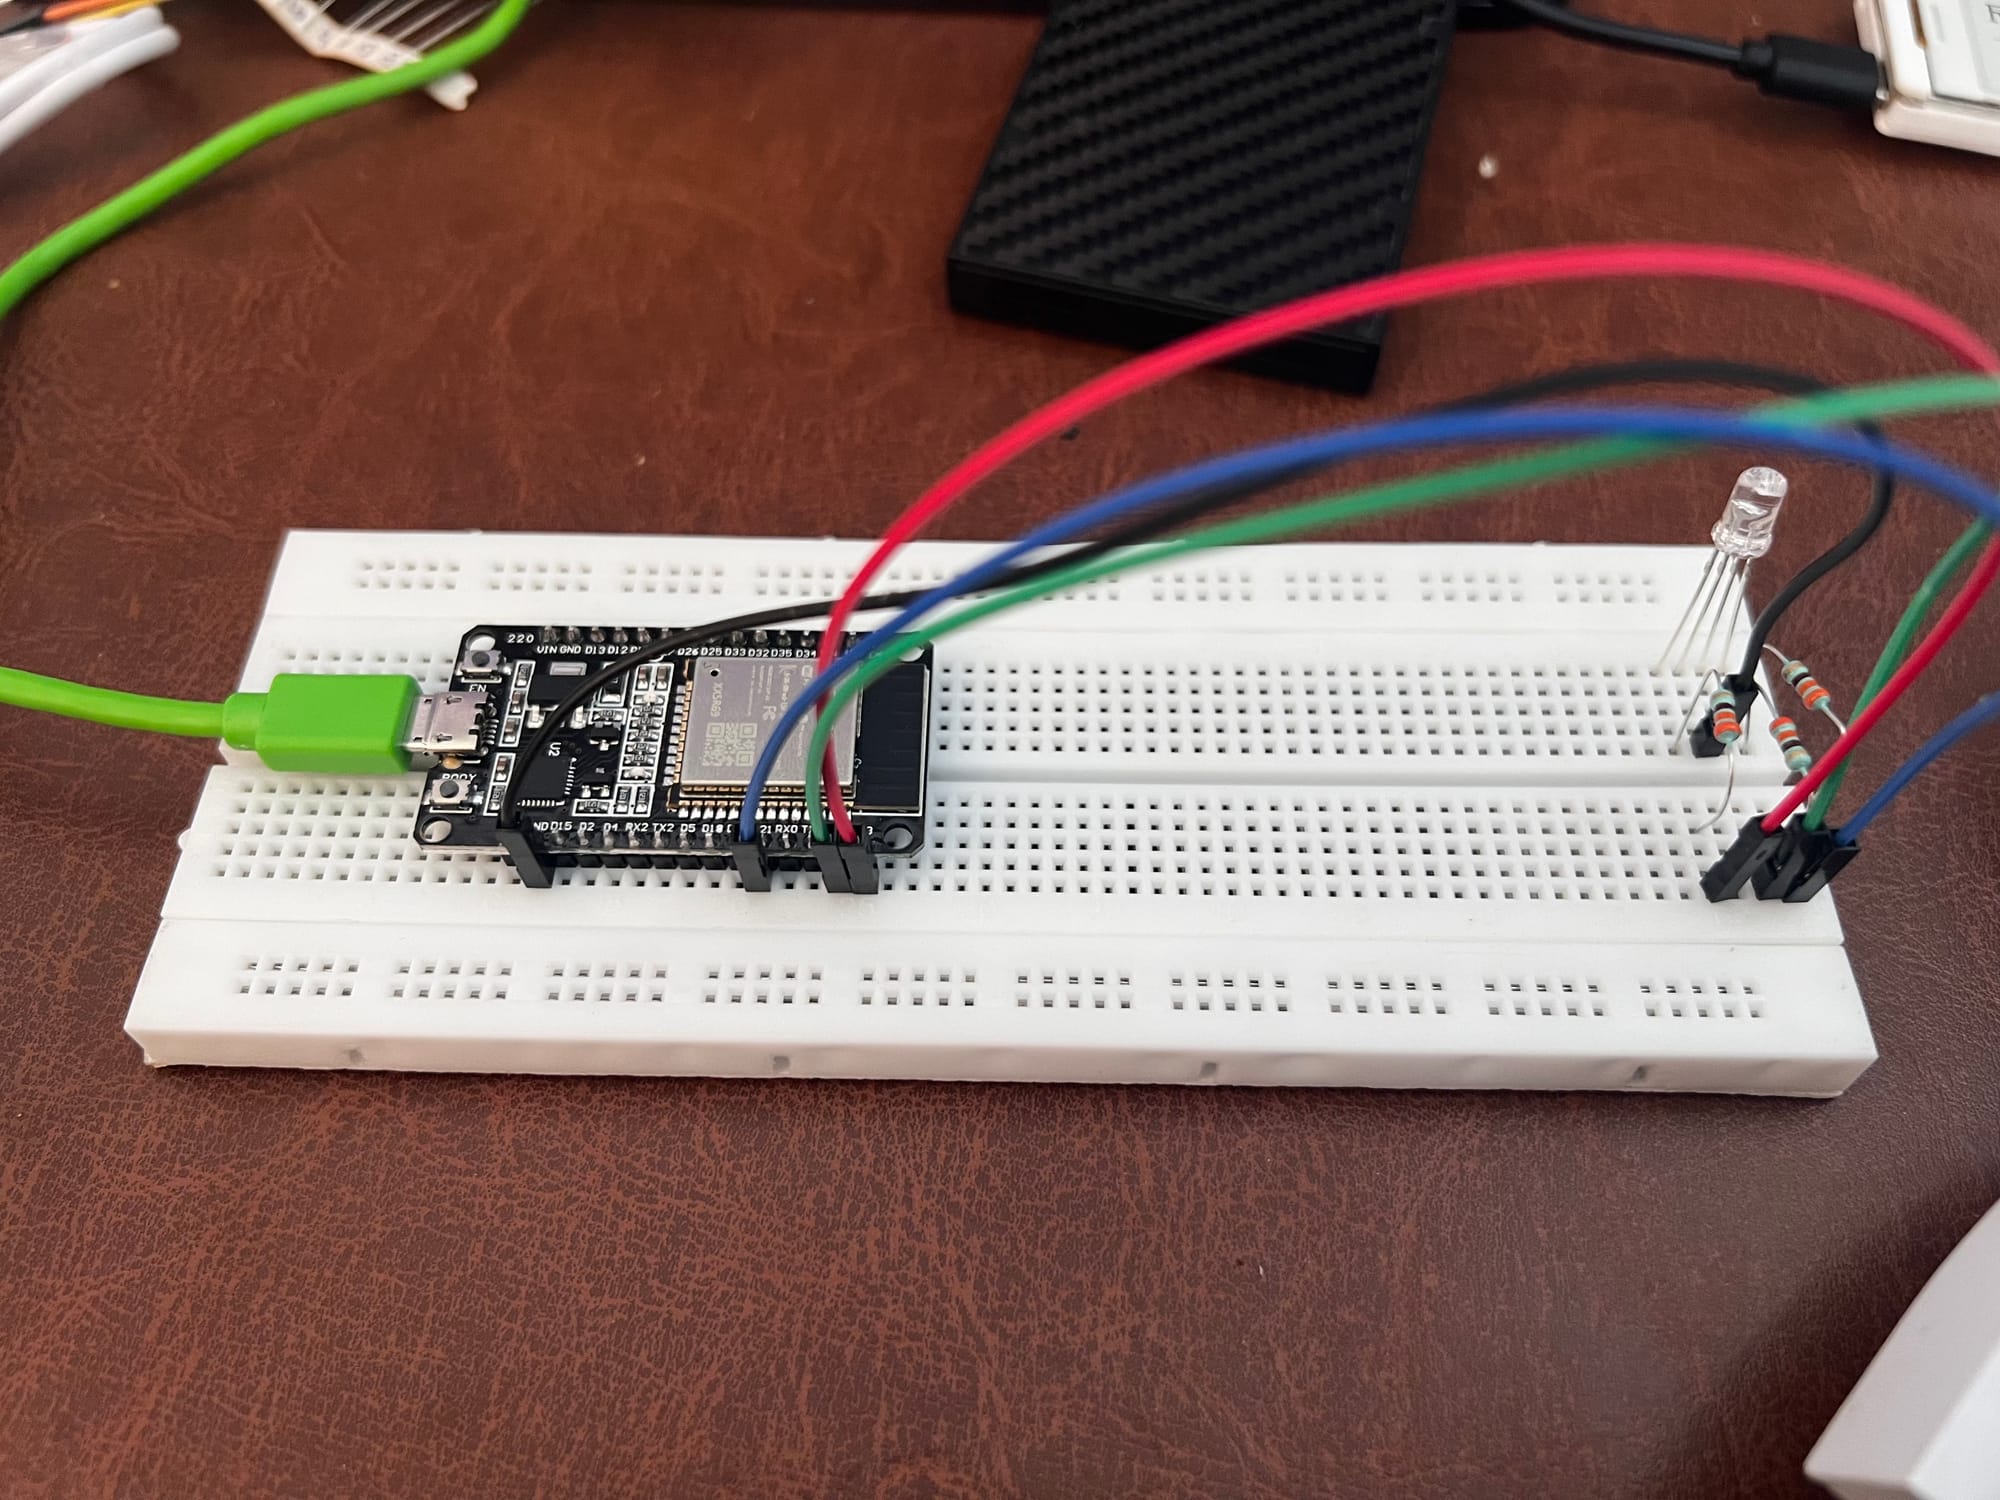
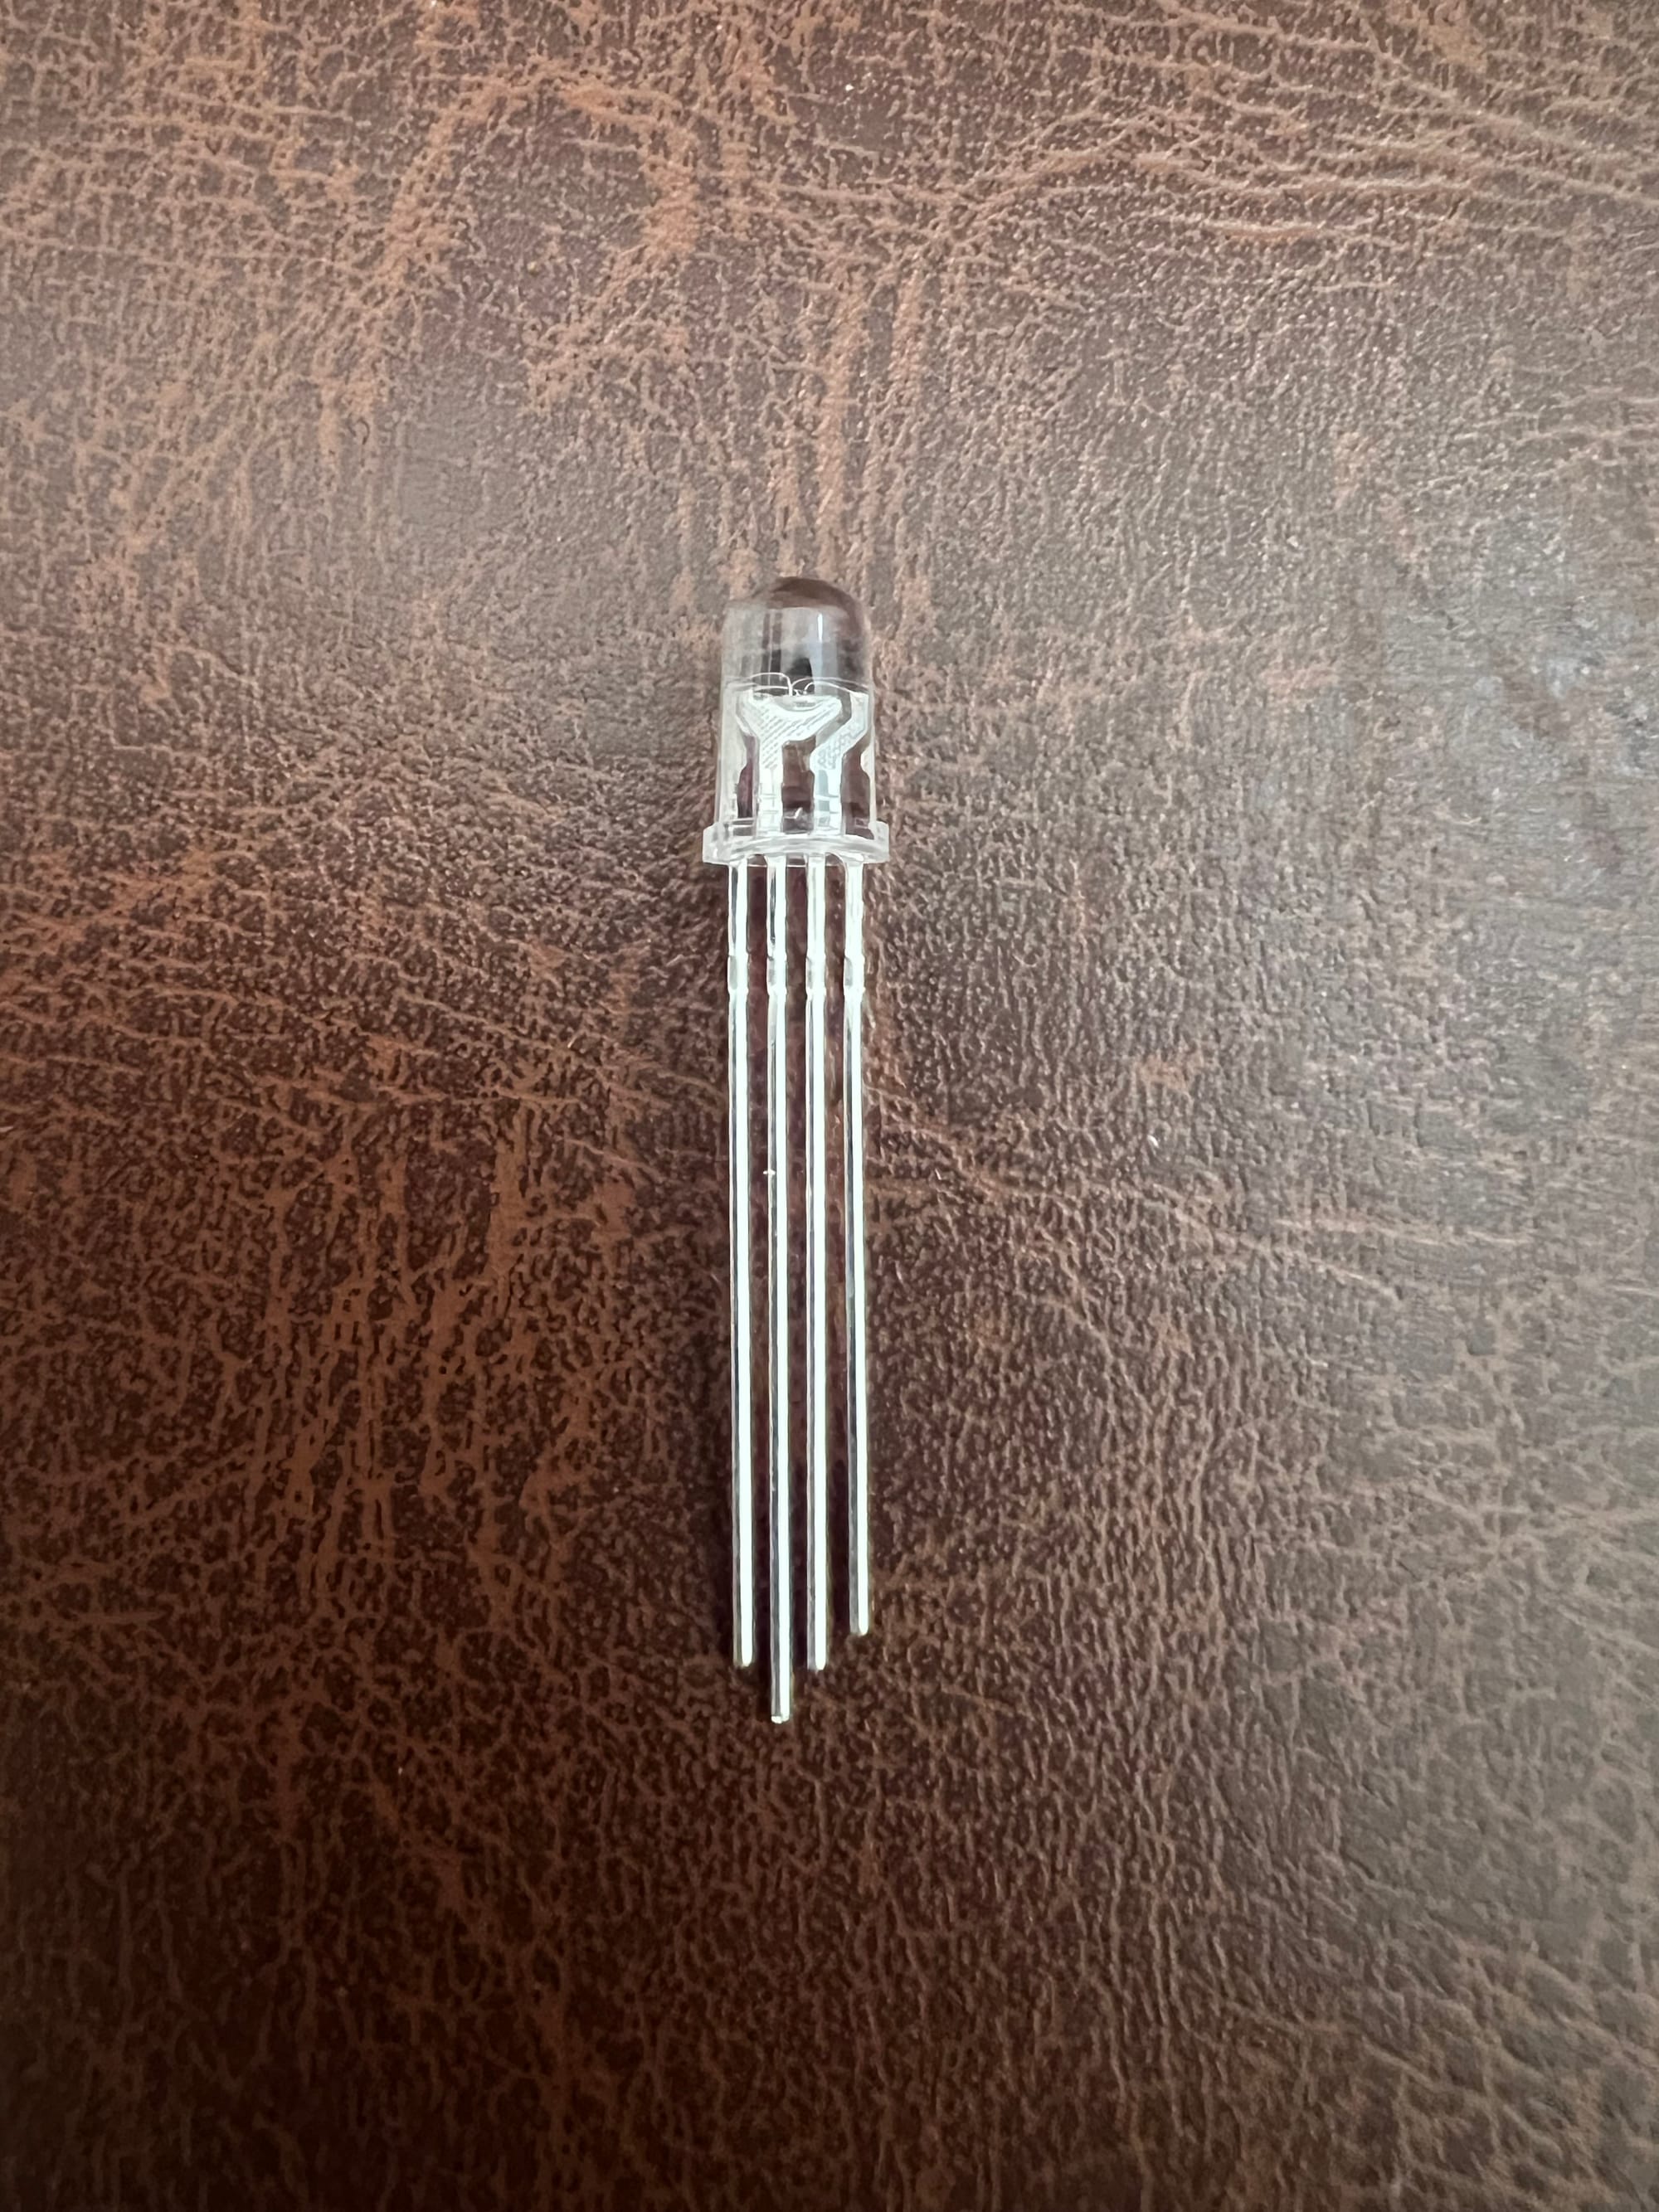
Then, the RGB LEDs have four nodes - one common pin and the remaining three for controlling the red, green and blue colors. The common pin exists to reduce wiring and is identified by the longest node. Except the common pin, all other pins have to go through the resistor to control the current passing.
Once the board was setup, the next step was the write some code and see if it did the intended light change. For writing code, Claude suggested Arduino IDE. We installed the package required for reading and writing the ESP32 and we were off.
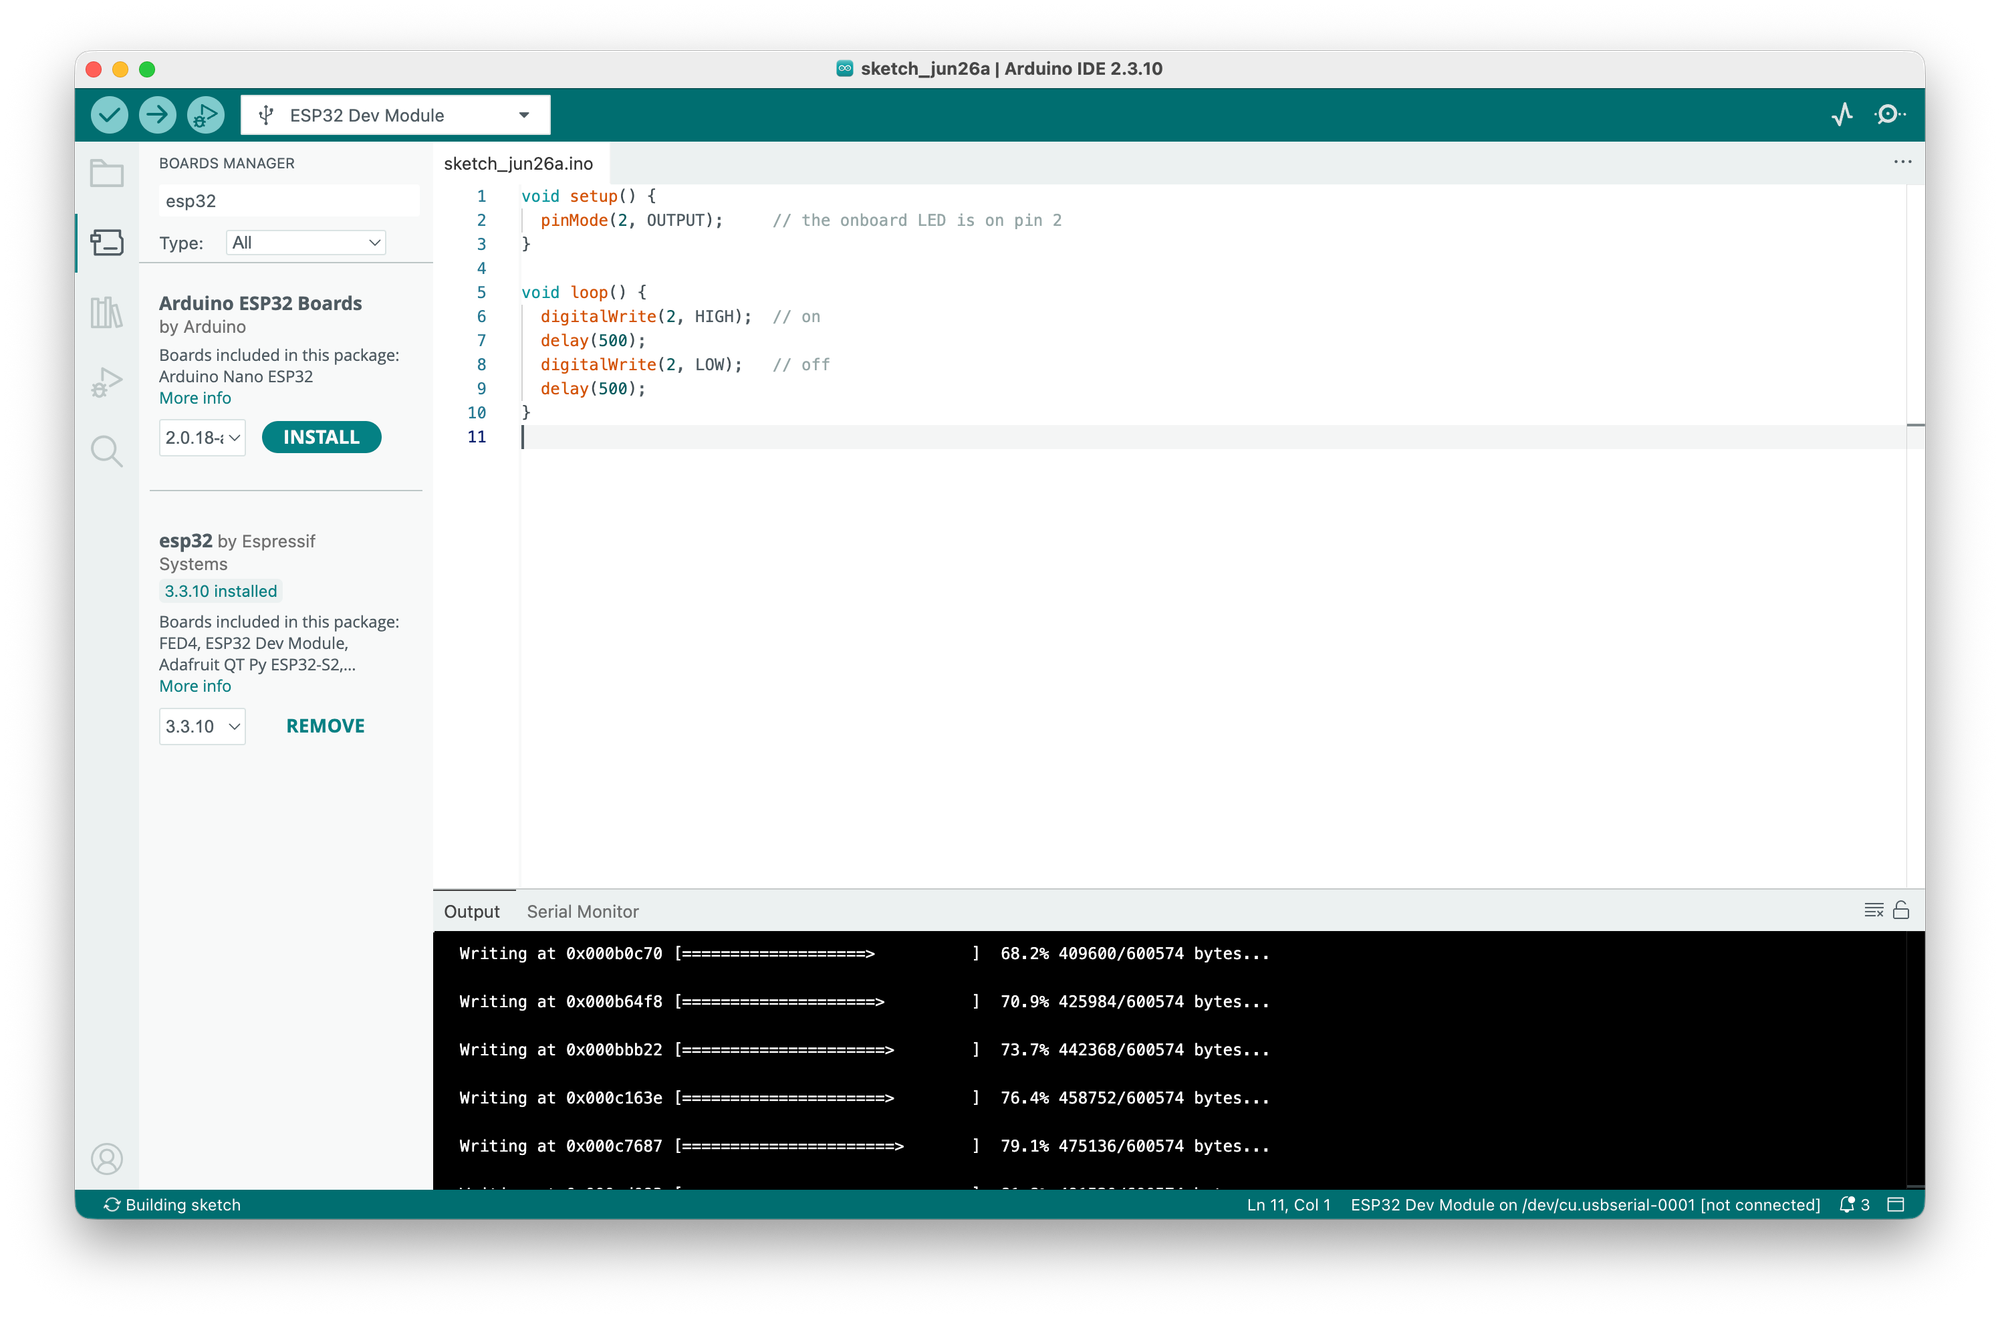
Once we knew that the connection was working and the firmware was flashing correctly on just the ESP32, we added rest of the board and manipulated the onboard LED.
Then we connected the board with my home network and that opened a bunch of new doors. It was far easier than I expected.
#include <WiFi.h>

// ↓↓↓ EDIT THESE TWO LINES ↓↓↓
const char* ssid     = "YOUR_WIFI_NAME";
const char* password = "YOUR_WIFI_PASSWORD";
// ↑↑↑ EDIT THESE TWO LINES ↑↑↑

void setup() {
  Serial.begin(115200);
  delay(1000);

  Serial.print("Connecting to ");
  Serial.println(ssid);

  WiFi.begin(ssid, password);

  while (WiFi.status() != WL_CONNECTED) {
    delay(500);
    Serial.print(".");
  }

  Serial.println("");
  Serial.println("WiFi connected!");
  Serial.print("Board IP address: ");
  Serial.println(WiFi.localIP());
}

void loop() {
  // nothing needed here for this test
}
Meanwhile, I had another real idea - what if we show a working indicator for Claude Code through the LED. And maybe change the color when it has finished working. And then show another color when it needs my input. So we did that instead. We would have to write a watcher script on Mac, that tells the board over wifi and the board changes the LED.
Claude Code → watcher script on Mac → tells the board → LED
Turns out Claude has bunch of Hooks that can be used to read its current status.
- UserPromptSubmit — fires the moment you send it a task → it's now working
- Notification — fires when Claude is waiting for input or permission → it needs you (your red) Claude
- Stop — fires when it finishes a turn → idle, waiting for you
So we add these hooks in the settings.json file and started seeing the status in the claude-status.log file.
  "hooks": {
    "UserPromptSubmit": [
      { "hooks": [ { "type": "command", "command": "echo \"$(date +%T) WORKING\" >> ~/claude-status.log" } ] }
    ],
    "Notification": [
      { "hooks": [ { "type": "command", "command": "echo \"$(date +%T) NEEDS-INPUT\" >> ~/claude-status.log" } ] }
    ],
    "Stop": [
      { "hooks": [ { "type": "command", "command": "echo \"$(date +%T) IDLE\" >> ~/claude-status.log" } ] }
    ]
  }
}```
But, before we could connect a watcher script with Claude status, Claude suggested we first test the connection manually by sending the curl command from the terminal.
So, we wrote another program that would print its IP address and we would use the IP address to communicate with the board. Essentially something like:
curl "http://192.168.68.106/state?value=NEEDS-INPUT"
curl "http://192.168.68.106/state?value=IDLE"```
As a result the board would update the LEDs. And it did. So we simply just updated each of the hook to do this:
"hooks": {
    "UserPromptSubmit": [
      {
        "hooks": [
          {
            "type": "command",
            "command": "curl -s \"http://192.168.68.106/state?value=WORKING\" >/dev/null 2>&1 &"
          }
        ]
      }
    ],
    "Notification": [
      {
        "hooks": [
          {
            "type": "command",
            "command": "curl -s \"http://192.168.68.106/state?value=NEEDS-INPUT\" >/dev/null 2>&1 &"
          }
        ]
      }
    ],
    "Stop": [
      {
        "hooks": [
          {
            "type": "command",
            "command": "curl -s \"http://192.168.68.106/state?value=IDLE\" >/dev/null 2>&1 &"
          }
        ]
      }
    ]
  },
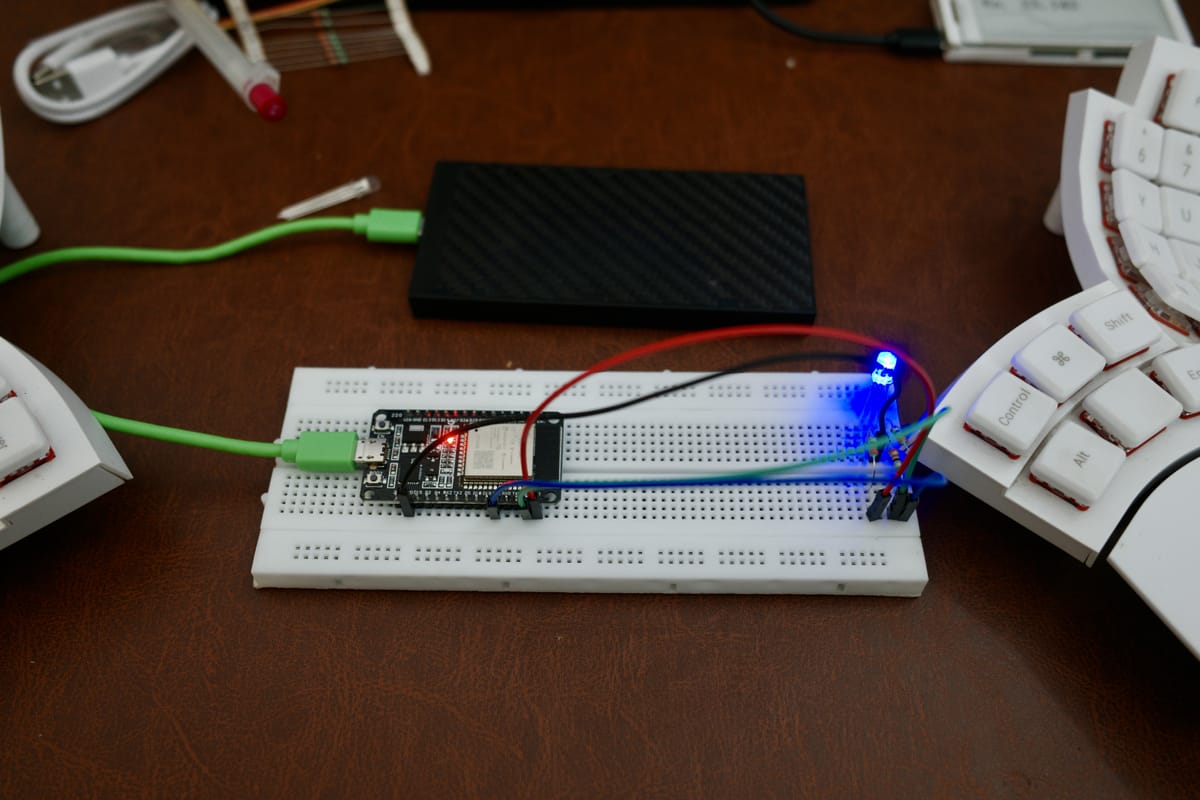
And this was the end result.
So everything was working as it was supposed to. But a problem remained: the router would assign a random IP when it would boot, so the board might get another IP assigned. We needed to fix an IP so the board could continue to get the consistent curls. And the fix was again simpler than I could have imagine. Look at the lines with IPAddress local_IP(192, 168, 68, 6);
#include <WebServer.h>

const char* ssid     = "YOUR_WIFI_NAME";
const char* password = "YOUR_WIFI_PASSWORD";

**// --- static IP settings ---
IPAddress local_IP(192, 168, 68, 6);   // the fixed address we want
IPAddress gateway(192, 168, 68, 1);       // your router
IPAddress subnet(255, 255, 255, 0);
IPAddress primaryDNS(8, 8, 8, 8);
IPAddress secondaryDNS(8, 8, 4, 4);**

#define PIN_RED   23
#define PIN_GREEN 22
#define PIN_BLUE  21

WebServer server(80);
String currentState = "IDLE";
unsigned long lastBlink = 0;
bool blinkPhase = false;

void setColor(bool r, bool g, bool b) {
  digitalWrite(PIN_RED,   r ? HIGH : LOW);
  digitalWrite(PIN_GREEN, g ? HIGH : LOW);
  digitalWrite(PIN_BLUE,  b ? HIGH : LOW);
}

void handleState() {
  if (server.hasArg("value")) currentState = server.arg("value");
  server.send(200, "text/plain", "state=" + currentState);
}

void setup() {
  Serial.begin(115200);
  pinMode(PIN_RED, OUTPUT);
  pinMode(PIN_GREEN, OUTPUT);
  pinMode(PIN_BLUE, OUTPUT);

  // apply the static IP BEFORE connecting
  if (!WiFi.config(local_IP, gateway, subnet, primaryDNS, secondaryDNS)) {
    Serial.println("Static IP config failed");
  }

  WiFi.begin(ssid, password);
  while (WiFi.status() != WL_CONNECTED) { delay(500); Serial.print("."); }
  Serial.println("");
  Serial.print("Ready! IP: ");
  Serial.println(WiFi.localIP());

  server.on("/state", handleState);
  server.begin();
}

void loop() {
  server.handleClient();

  if (currentState == "NEEDS-INPUT") {
    setColor(true, false, false);
  } else if (currentState == "WORKING") {
    if (millis() - lastBlink > 400) {
      lastBlink = millis();
      blinkPhase = !blinkPhase;
    }
    setColor(false, blinkPhase, !blinkPhase);
  } else {
    setColor(false, false, true);
  }
}
And now, even when the router switches off or reboots, the board is going to have the same IP so it would continue to get the same curl requests from the Claude config.
Feel free to ping me on @knsoo8 if you run into a blocker and I would be more than happy to help.
On to the next idea.